
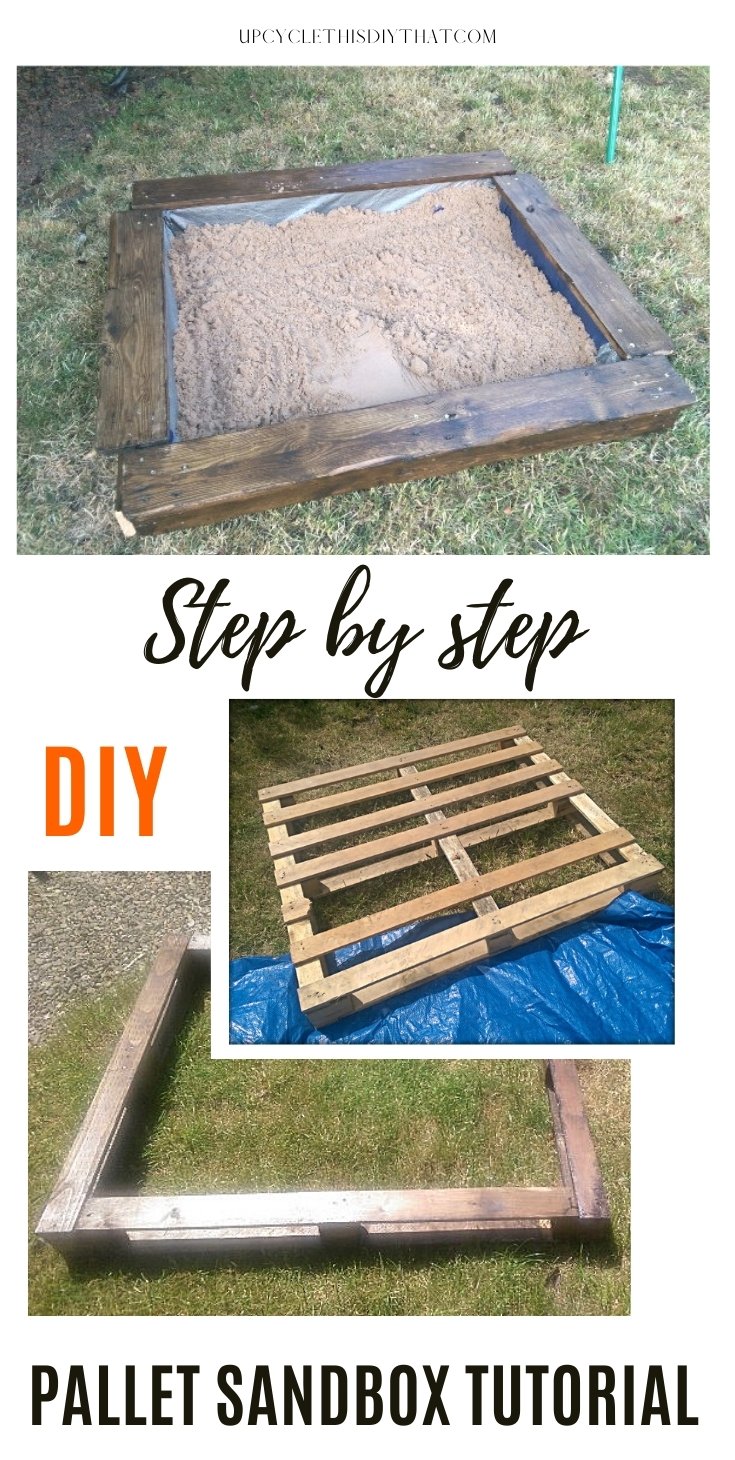
DIY Pallet Sandbox-A Simple Upcycling Project
This post includes affiliate links. If you decide to make a purchase through my link, I might get a small commission for it at no additional cost to you. Thank you for supporting Upcycle This DIY That!
Kids love playing outside and a sandbox is one of the best ways to keep them entertained. But, if you don’t have a lot of money or space for a fancy sandbox, why not make your own? Pallets are inexpensive and easy to find in most places.
They’re sturdy enough that they can be made into anything from furniture to an outdoor kitchen.
If you want something more than just sand in your backyard then give this tutorial on how to make a DIY pallet sandbox with recycled materials from around the house!
YOU MAY ALSO BE INTERESTED IN:
Preparing Pallets For Upcycling – All You Need To Know Guide
Getting Started – Working With Pallets
Wood sanding Tips for Upcycling and Pallet Projects
Best Sander for Pallets
How To Build A Pallet Coffee Table Step By Step
How To Make A Pallet Herb Garden
So there it is. My first pallet project made from the beginning to the end by ME :)) Oh well, with a little help from my brother 🙂
In this post, I’m going to show you how to make a DIY pallet sandbox and what tools and materials I’ve used.
This is a project I had not done any research on before I started. I just had an idea in my head and as it’s quite straightforward it wasn’t that difficult to make.
All you need is a couple of pallets and some tools. You can find the list of the materials and tools below.
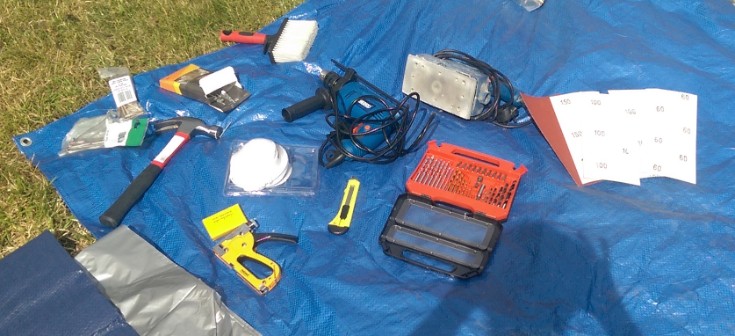
Tools and Materials
- To disassemble my pallets, I used a crowbar, a hammer, and my brother 😉
- For sanding, I had a finishing sander and two grades of sanding paper, 60 and 120
- To stain the wood, I used seal-sealing woodstain in gloss rustic oak.
The list goes for a bit longer, but be patient, please:)
- Paintbrushes in 2 in and 4 in size, but any size you like will be great
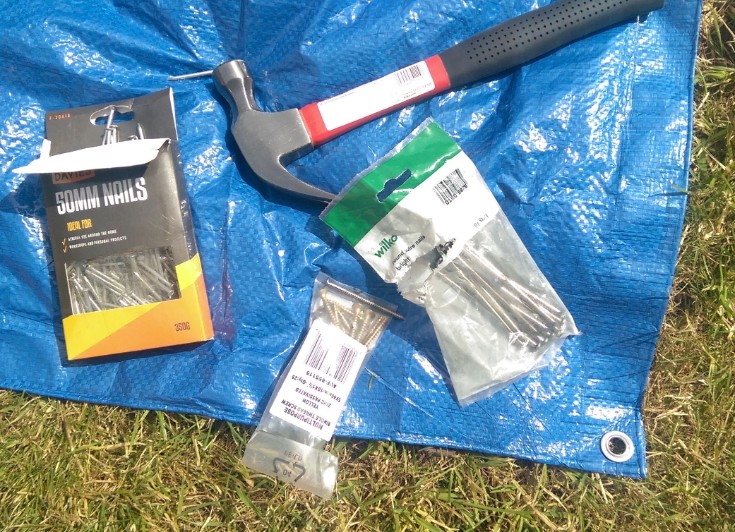
- 50mm (2in) nails and single thread yellow zinc passivated screws 5 x 40mm (6 x 1 1/2in)
- some damp cloth to wipe off the dust after sanding
- A tarpaulin I used to put on the ground when sanding
- A handsaw, not very much used this time 🙂
- A utility knife
- safety goggles, and a dust mask/respirator
- power drill with drill and screwdriver bits
Remember to put some used clothes on or overalls because the job can get very dirty 🙂
DIY Pallet Sandbox step by step
Preparing Pallet no 1
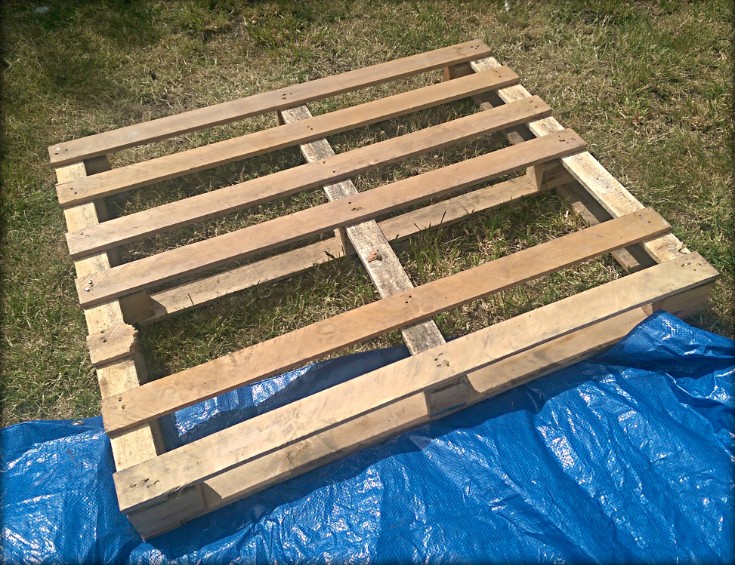
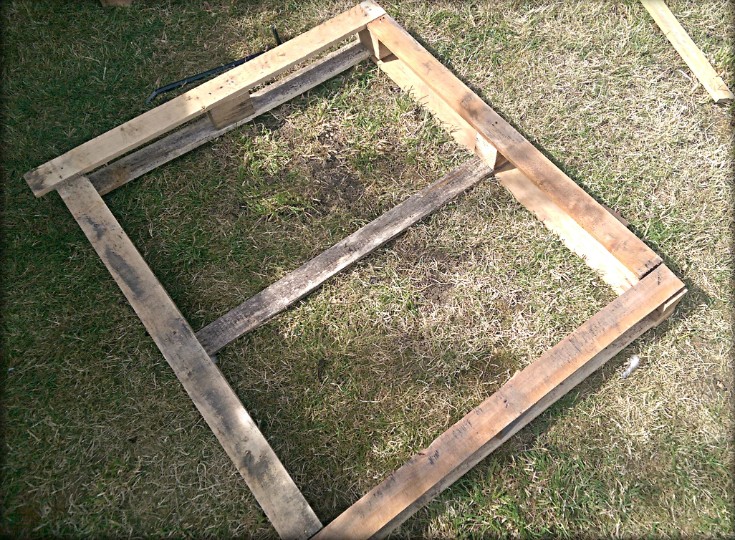
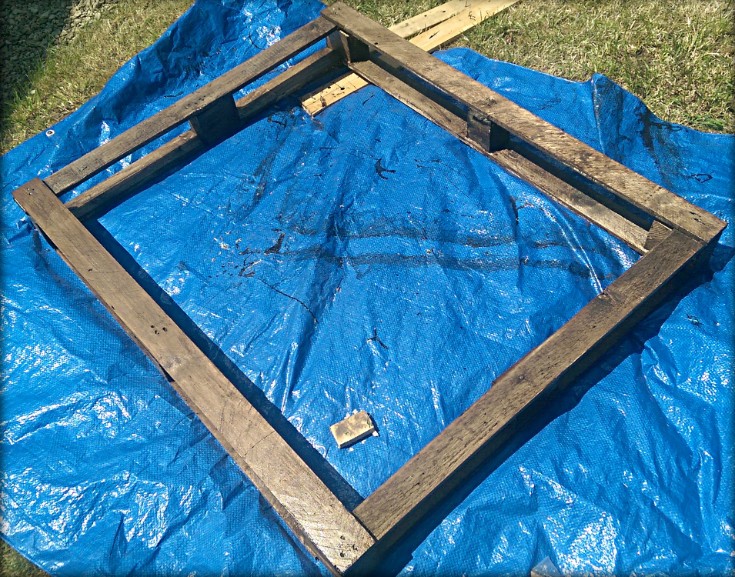
I’d chosen a lightweight, 4-way entry pallet 1000×1200 mm (40 x 47 in )mainly because I thought it would be easy to disassemble. I needed to get rid of some of the planks. How wrong I was.
Most of the planks snapped because the little nails had been glued and threaded, so not easy to remove at all. You may ask how to disassemble a pallet. I have a post that answers that question that you can check out here.
One of the planks I needed snapped, so it had to be replaced and cut to size.
This is the frame that was left.

Preparing Pallet no 2
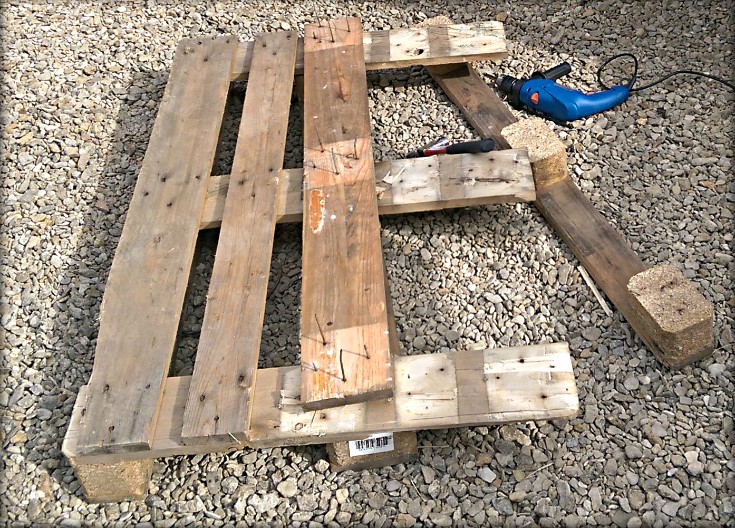
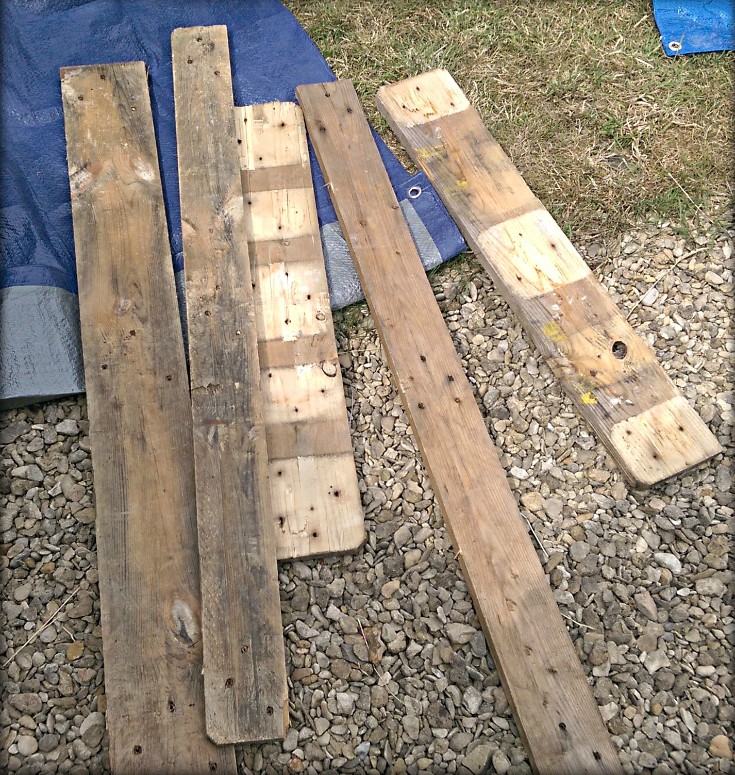
Then I moved to a heavyweight euro pallet. I dismantled it completely because I was going to only use the boards to make the body of my pallet sandbox.
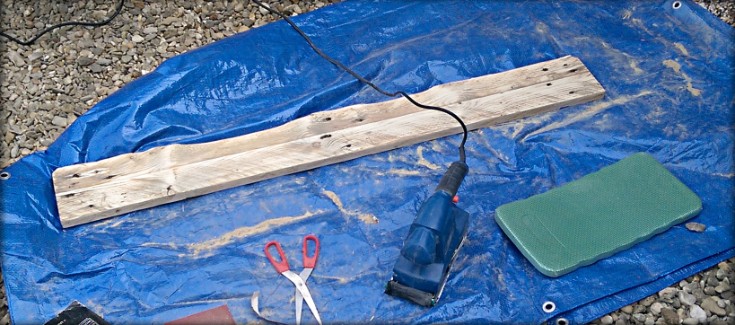
Sanding and staining
Just to give you a heads-up, I’m not going to write about sanding and staining in great detail here. Check out my posts on staining pallets and sanding wood tips for more info.
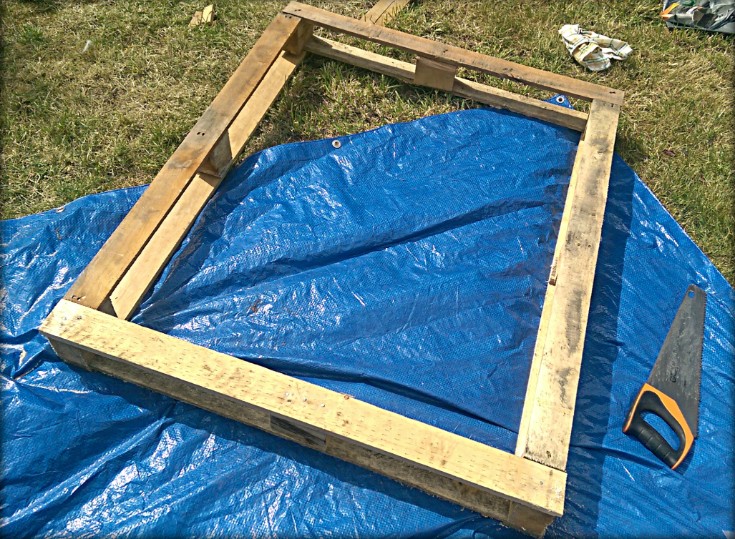
After that, I moved to sanding and staining(painting). First was the sandbox frame. I only sanded the top and bottom planks on one side. Just enough to prepare them a bit for staining.
I didn’t want to dismantle what was left of the pallet completely and then sand and stain and put it back together.
I think it wasn’t necessary, as boards were not going to be visible anyway. I just wanted to make sure they are water-resistant so they wouldn’t rot.
I stained the wooden frame with a self-sealing water-resistant wood stain. You can use whatever you want. Just make sure it’s usable outdoors, and it’ll give you a nice water-resistant coat.
Then I’d started on my thick boards from the euro pallet. The long ones were going to be used as outside walls of my pallet sandbox. The short, wider ones as tops (for sitting).
I sanded all of the boards on both sides and after wiping the dust off of them, I stained them with the same wood stain. With this one, you have to wait 4 hours before applying another coat if you want to.
I always do 2-3, sometimes 4 coats. It just looks better and is smoother to the touch. Remember to sand between coats.
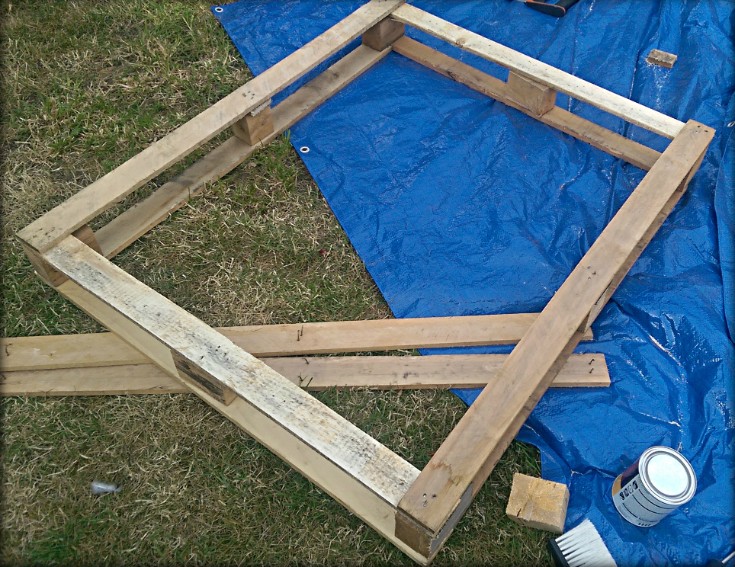
So this is what my sanded and stained boards looked like.

and the wooden frame with sideboards/walls
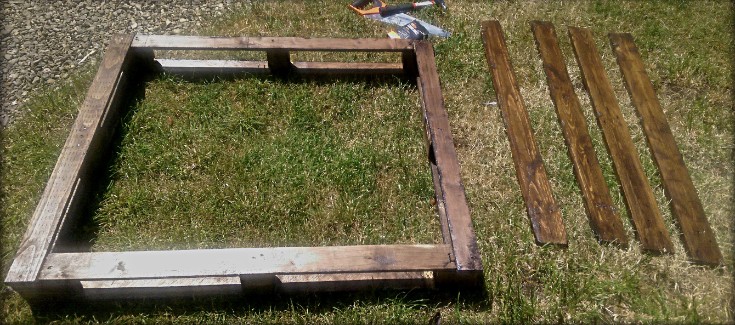
Just to mention, I only sanded twice and stained twice on the side that was going to be visible or sat on.
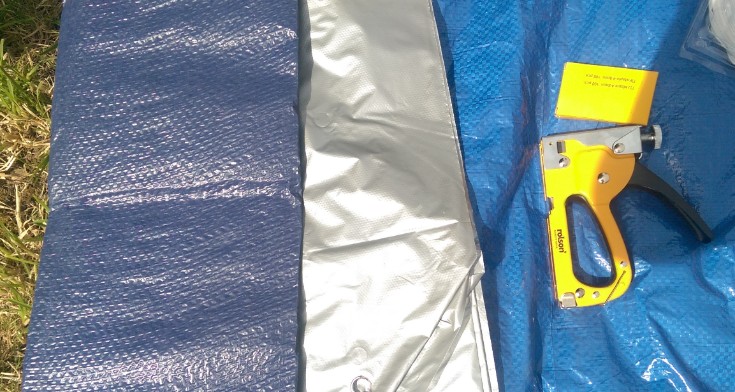
The next step was to nail the side planks in place. you can use a nail gun or regular nails. Drilling and screwing them is also a good option. After that, I was ready to attach a tarpaulin sheet to my frame by stapling it with a stapler to the top frame boards.
When doing so, just make sure it’s not stretched much. It should be rather loose as you’ll be putting some sand inside, and you don’t want it to tear.
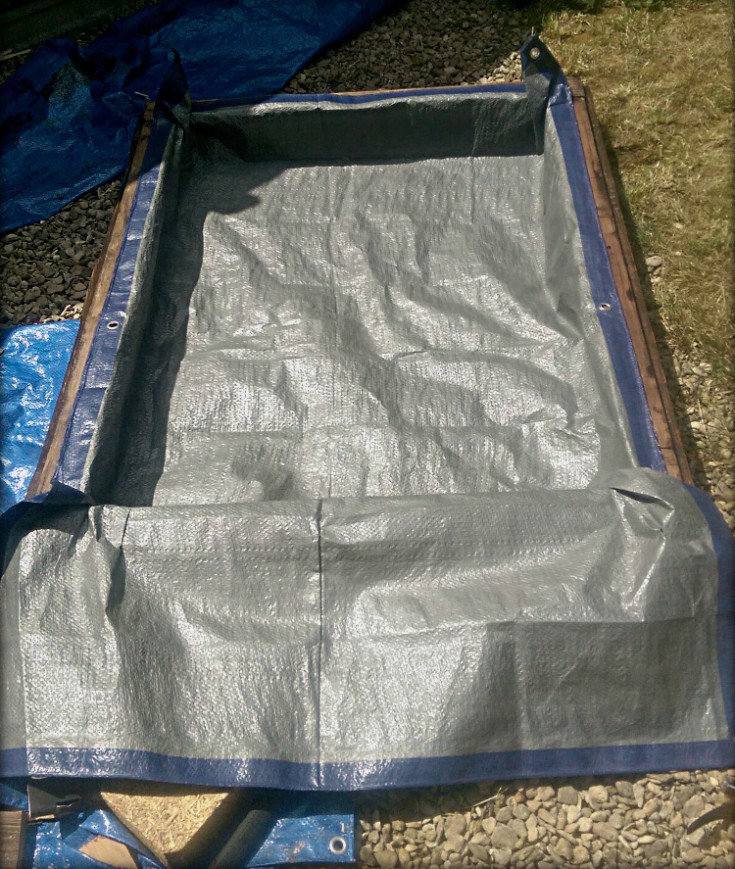
As you can see, the tarpaulin sheet that I’d used was longer than I needed. I was going to cut it to size but decided to fold it inside instead. This way, I saved time. You can probably get a cut-to-size sheet, but I didn’t bother as it cost me around $ 1.50.
The next step was to screw the wider boards on top of the pallet sandbox frame. I used the existing nail holes wherever possible.
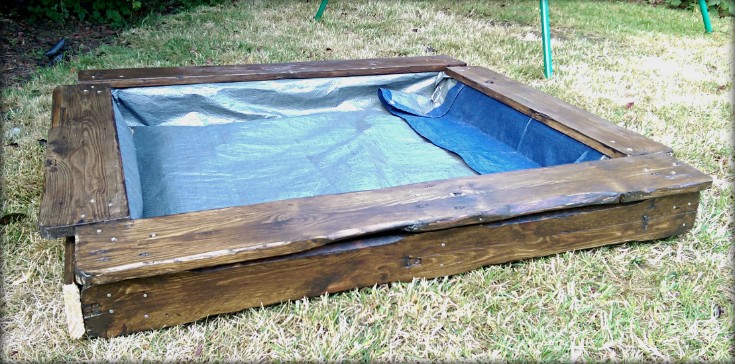
I drilled through them (or drilled new ones) into the frame and then used the screws to attach the boards. I especially used screws, not nails, because I wanted the planks to be removable.
Just in case the tarpaulin tore, I could always replace it that way. Just make sure the screws are not sticking out of the boards for safety reasons.
The final result-Pallet sandbox for kids
So the final result looked like this:
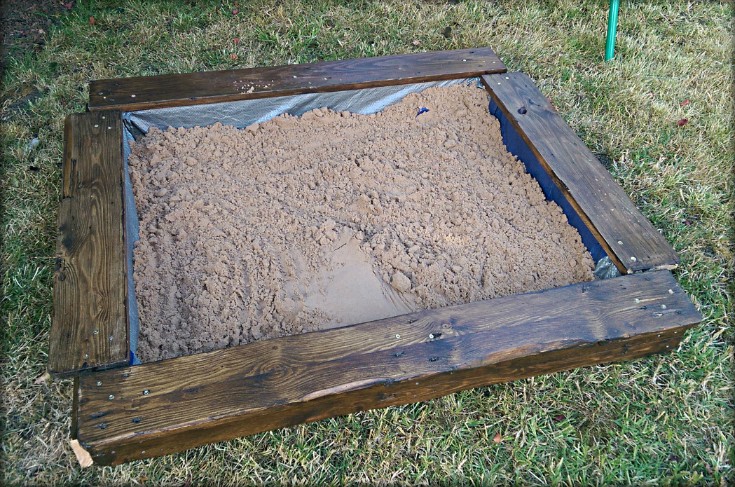
I’ll be putting in more sand to cover the tarpaulin. I’m sure my little daughter will appreciate this little playing space for her. Final tip. You can always build a wooden cover to secure the sand from rain or contamination when not in use.
An easier solution is to use another tarpaulin sheet on top secured with a string through the holes. Garden furniture covers are great for this purpose as well.
FAQs
You might be wondering why a sandbox is such an amazing idea. It’s because it gives kids the opportunity to play, explore and learn in a safe environment that allows them to use their imagination without any distractions.
If you’re looking for something fun and creative to do this summer, make one of these pallet sandboxes for your children today. They’ll love playing outside all day long while you get some much-needed relaxation time too!
If you like it, don’t forget to pin it to your pallet projects board.
Subscribe To My FREE DIY Newsletter!
Stay in touch and receive things like updates, special offers, new projects, tips, gear reviews, and more. No spam, promise!
By entering your email address, you agree to get an email newsletter from UpcycleThisDIYThat. I’ll respect your privacy, and you can unsubscribe at any time. For more details, review our Privacy Policy.


Wow! this is a great way to make your own sandbox. My niece and nephews will surely like this. It’s also fun to do it with them watching so that they will see how it was made. This will inspire them to build things even by using clays or legos or maybe create a sand castle 🙂 A good training tool for the kiddos!
Thanks Keye for Your comment 🙂 You’re right It’d be great for teaching kids. My four-year-old was first to helping me out with everything and kept asking “Is it ready? Is it ready? I want to build my sandcastles mummy” 🙂
It’s nice to show them that you can actually make something instead of buying and you’d love it forever because it’s your creation 🙂
Wow, I love this type of posts. I like doing this kind of things but I need to have some kind of thing n paper or picture to follow directions. It’s a shame that my kids are grown up for this now. But I’ll be on the look out for other fun projects you have here.
Hi Ana, I’m glad you liked my pallet sandbox:)If you need a hard copy, you could try to print this blog post.I’ll think about an e-book with all the projects I’ll have collected over time but that’s still a way to go.
Make sure you come back 🙂 I’ll be posting some tips for sanding and staining pallets and next pallet project which is Herb Garden and Plant Pots is due soon as well.
Have a great weekend!
Kasia
Hi! Kasia, how many sandbags did you use to fill it in?
I think 4-5 10kg ones.