Tool Tips: How to Use An Orbital Sander
This post includes affiliate links. If you decide to make a purchase through my link, I might get a small commission for it at no additional cost to you. Thank you for supporting Upcycle This DIY That!
If you’re new to woodworking, you might be wondering why an orbital sander is such an important tool. Here’s a quick overview of what this tool can do and why it’s so essential for anyone who wants to create professional-looking woodwork.
An orbital sander/finishing sander is a type of power tool that sandpaper against the surface of a piece of wood. It’s called “orbital” because the sandpaper moves in a circular pattern as it sands. This type of sander is ideal for creating a smooth, even finish on wood surfaces.
Compared to other types of sanders, an orbital sander is much less likely to leave behind swirl marks or other imperfections.
That’s because the random orbiting motion of the sandpaper helps to distribute the sanding pressure across the entire surface evenly. As a result, you’ll end up with a smoother, more uniform finish.
If you’re looking to achieve professional-quality results with your woodworking projects, then an orbital sander is an absolute must-have tool. With its help, you can create smooth, even finishes that will impress anyone who sees your work.
So if you’re serious about woodworking, make sure you know how to use this essential tool!
Now, most woodworkers/DIY-ers would already have a finishing sander. If not, you are certainly considering buying one as you are reading this post. Check my recommendations for the best finishing sander models available on the market.
What is an orbital sander?
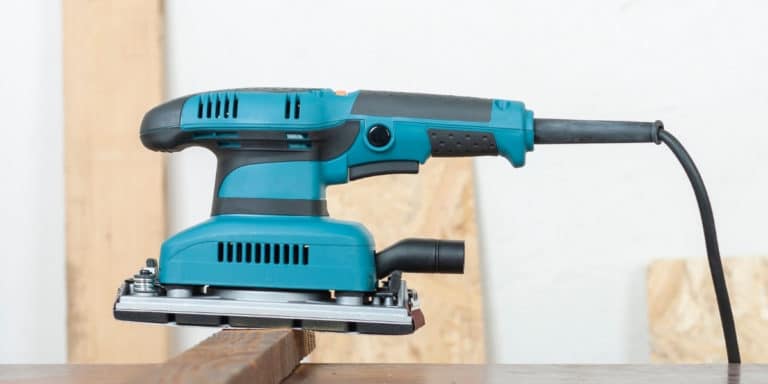
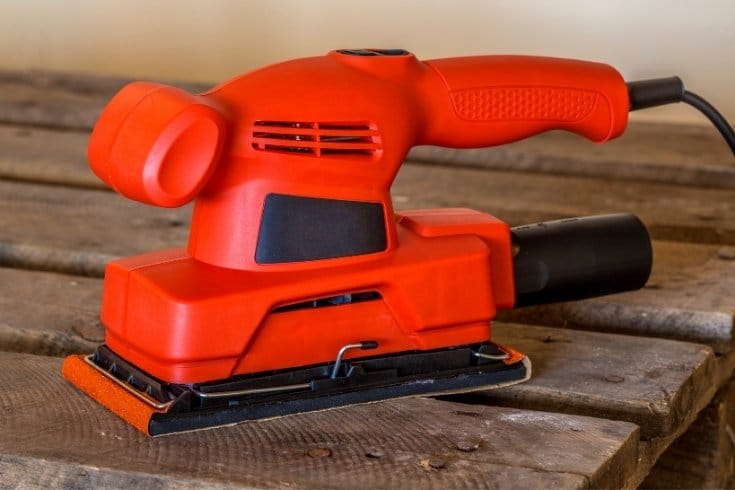
An orbital sander is a type of power tool that has changed the way we sand wood. Also known as a finishing sander, this tool is mostly used for gentle stock removal from the wood pieces in the final (finishing) stage or production.
It is fairly easy to control with one hand, thanks to its lightweight and small dimensions.
As mentioned above, the square/rectangular sheet that comes in contact with the wood moves in small circular motions removing the stock from the surface.
Sizes of Orbital finishing Sander:
Orbital sanders have been so far claimed as the easiest to use & maintain tools. They do come in varieties and are categorized based on their sheet size.
- 1/4 sheet
- 1/3 sheet
- 1/2 sheet
Let us discuss each type of sander in detail.
1/4 sheet size
When you need to finish wooden surfaces and the work is in a confined space, you need a 1/4 sheet sander or perhaps a detailing sander.
These are compact and thus easily reach limited areas. This is the reason they are also known as ‘Palm Sanders’, as they are small and can be handled with one hand.
Unless your sander uses a hoop and loop system to save on sandpaper, you can buy full-size sheets and cut them in four.
> 1/3 sheet
These are the most commonly used sanders. Usually fit to do any type of sanding job, these tools are popular in domestic as well as commercial setups.
They are fairly small and can be easily handled while sanding. You will need a 93 x 230 mm replacement sheet to use with this tool.
> 1/2 sheet
As the name suggests, these are the largest sanders in size. They aren’t very useful at homes but are more often used in commercial setups, where large sheets need to be sanded in minimum time.
A bigger pad size means a bigger surface is sanded in less time. The replacement sheet size for this type of sander is 115x 280 mm.
They can also be classified by their shape
- The first one is profiling sander or contour sander. These types of sanders come in different shapes and sizes and are designed for sanding intricately shaped surfaces like moldings and carvings.
- The second one is a detailed sander or mouse sander and has a triangle-shaped pad that allows the sander to reach inside corners and restricted areas with ease.
How to use an orbital sander?
Orbital sanders are the most popular because of their smoothing capabilities. They are usually used to ultra-smooth wood, rounding sharp edges, sanding off the wood putty, or varnish coats.
It has a sanding sheet at its bottom, held by two spring-loaded clamps over a square pad or hoop and loop system.
As the machine starts, the pad vibrates and moves in small circles, better known as orbits.
Once you have picked your type of sander, use it, considering some dos and don’ts. Here are some essential things that ensure you make the best use of your tool.
Using a sander
If you’re new to woodworking, you might be wondering how to use an orbital sander. Here’s a quick guide to help you get started.
First, gather your materials. You’ll need an orbital sander, sandpaper, and a piece of wood. Make sure the wood is free of dirt and debris before you begin.
Next, attach the sandpaper to the sander. Be sure to use the correct type of sandpaper for your sander – there are different types for different machines. Once the paper is in place, turn on the sander and let it run for a few seconds before moving it to the wood.
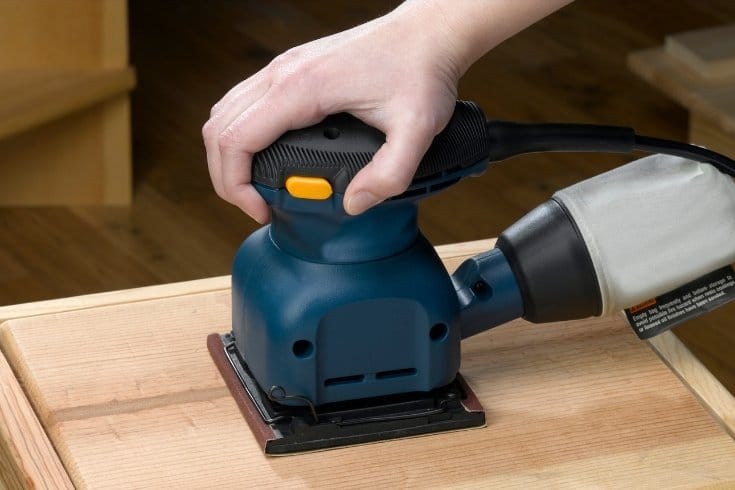
Power sanders usually operate through two buttons. One that allows you to cut and resume power supply to the machine and the second one – a lock-in button that allows for locking the power button in the “ON” position, letting you place your hand more comfortably on the tool’s body.
Make sure that you switch the sander on and off away from the surface to prevent any damage.
Start with light pressure and move the sander in small, circular motions. Slowly increase the pressure as you go. Remember to keep the sander moving – if you stay in one spot for too long, you’ll end up with a deep gouge in the wood.
Finally, when you’re finished sanding, clean off the wood with a damp cloth to remove any dust. Then, apply a finish of your choice – wax, varnish, or paint – and enjoy your newly sanded project!
Important things to keep in mind while using orbital sanders:
- Secure your work with clamps against the wood.
- Use the tool as directed in the manual.
- Do not let the machine run unattended.
- Wear personal protective equipment like goggles, ear protection, and dust respirator
I hope, now you know a little bit more about how to use an orbital sander, and I’m sure you’ll get better at it with some practice. Anyway, if you have any questions, let me know by leaving a comment below 🙂

Subscribe To My FREE DIY Newsletter!
Stay in touch and receive things like updates, special offers, new projects, tips, gear reviews, and more. No spam, promise!
By entering your email address, you agree to get an email newsletter from UpcycleThisDIYThat. I’ll respect your privacy, and you can unsubscribe at any time. For more details, review our Privacy Policy.